Looking for ways to help students transfer what they learn in direct instruction to collaborative and independent practice? Graphic organizers are one of my favorite teaching resources because of their versatility. Plus, they provide access points for all students to participate in critical thinking and discussion, regardless of their readiness levels. In essence, they often differentiate themselves.
1. Reading Strategies
Whether you’re teaching students to analyze point of view or bias…or you’re working on developing reading strategies like inferring and visualizing, graphic organizers can help. Through direct instruction, model thinking for students using excerpts of high interest texts. Then, provide students with the scaffolding they need to begin working a small group format by using a graphic organizer.
I like to keep copies of this set of reading graphic organizers handy so that I can pull them out when students need some guidance. Differentiate by targeting specific skills with the students who need to develop them.
2. Root Words
What’s better than teaching students to identify root words? Helping them to form a visual association! I create anchor charts to help students understand the concept of a root word, which is complex for many students. I love anchor charts, but I want students to be able to play with words in the same way.
So, I give them a handout version of a root words anchor chart, and we come back to it as we discuss root words and related words. The connections? With this brain-based approach, they stick better!
3. Literary Analysis
Literary analysis is such a large part of standards learning. I’ve noticed that in order to promote metacognition about analysis, they need some explicit instruction about what it is, why we use it, and the vast range of texts it can apply to. So, I began incorporating a literary analysis unit.
We explore a variety of genres of literature, and with each type (commercials, songs, fiction, nonfiction, poems, movies, and paired texts), we use a graphic organizer that prompts students to think from certain angles about what they are reading. Teaching students to learn ask these questions themselves is part of teaching literary analysis!
4. Book Fit
Levels don’t work with helping most older students find “Just Right” books. Graphic organizers have a much more positive association with reading than levels anyway. Try using a reading ladder visual with students to help them track what they are reading. I use a ladder to explain that the “right” book for them really is the one they want to read. After all, if they realize they reached a shelf too high and are frustrated or a couple shelves too low and are bored, they can always reshelve the book and pick another!
5. Stop and Jots
Transitions are hard for some students…and some classes in general. We have to be creative with how we build thinking into those transitions so that students don’t even realize they are transitioning! For example, I love using stop and jots. They’re the perfect opportunity to get students either reflecting on what they just did or anticipating what they will be learning next.
Have some graphic organizers handy to make your stop and jots visually appealing and so that students can doodle, sketch, or color if they finish before others. Stop and jots are incredibly helpful at providing formative feedback for the teacher as well. (Grab a couple of these for free in my resource library by signing up here.)

6. Poetry Analysis
When we read poetry, I want students to study the diction, to visualize the figurative language, to feel the tone and mood. Poets craft their work stylistically for effect, so it’s fun to study author’s craft in poetry analysis. In order to put all of the analytical pieces of the puzzle together, why not use an organizer?
A poetry graphic organizer can help break down the analysis into chunks so students can focus on each element separately. Then, they can synthesize their thinking using symbolic color and scaffolding to create a poetry one pager.
7. Essay Acronyms
In order to let students fly with their creativity as writers, we need to provide a solid foundation of knowledge they can draw from. Not all students need the same type or amount of scaffolding, but I’ve noticed almost all students appreciate having a general idea of what is expected. If we just say, Go write an essay!, they have certain ideas already in mind based upon what they have written in previous years.
My writers who need more step-by-step instruction benefit from paragraph acronyms organizers. Acronyms help ground them. They have an idea of what type of information to include where. We might be tempted to think that students who excel at writing can just go do, and maybe they can! Yet, it helps to reduce their stress and anxiety if we give them a guideline that they can build off of, refer to, and even deviate from to make their writing unique.
8. Literature Standards
I haven’t met a teacher who doesn’t love reading short stories with students. But, the short story isn’t dong any teaching if all we are doing is reading it. When I design a lesson involving a short story (or even a novel), I begin by identifying what standard I’m teaching. Then, I deconstruct it and create a graphic organizer that will help scaffold the analysis process for that standard.
When used with literature like short stories and novels, graphic organizers help to ground students’ thinking, build confidence, and save time. Plus, they make for great discussion prep!
9. One Pagers
It’s always helpful to use graphic organizers when students need some scaffolding with an abstract task, like the ever-popular alternative to the essay: one pagers! Use graphic organizers to help students brainstorm ideas to include in their one pager as well as how they want to structure and display that information.
Often, students learn to enjoy creating both informational text and literature one pagers when they have a graphic organizer to get them started.
10. Thesis Statements
Thesis statements, specifically, can get sticky. Graphic organizers can help students to narrow their topics (yes, technology is probably too broad!), write a thesis statement, draft topic sentences that support the thesis statement, and brainstorm support. In doing so, students have an idea of what research they need to find.
I don’t let them actually start writing the essay until they’ve conferred with me about their graphic organizers. You’ll find the ones I use in this thesis statement mini lesson.
And that’s ten of my essential graphic organizers. I have used them regularly, and along with modeling and conferring with students, they are one of my favorite differentiation tools.
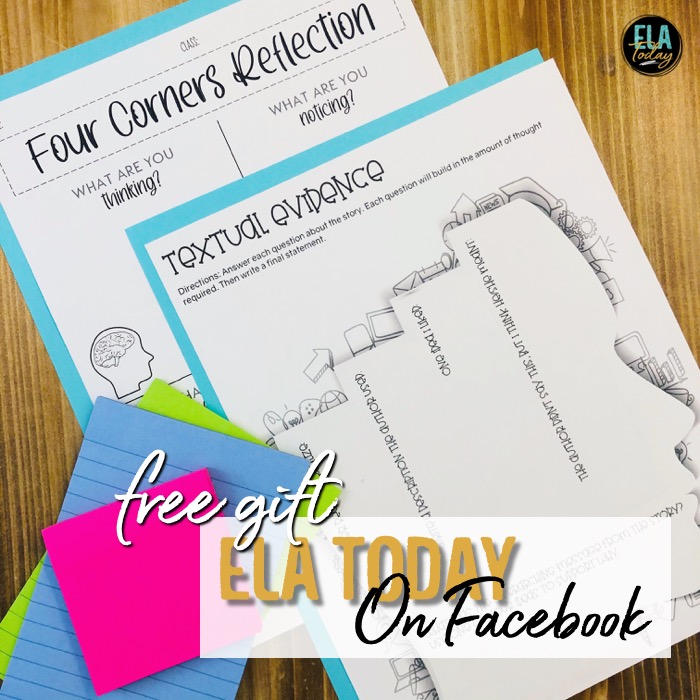
If you’d like to grab the two graphic organizers pictured below, join us in our ELA Today Facebook group! They will be waiting for you on the inside.
Further Reading:
You’re probably reading this post because you love graphic organizers as much as I do; if so, you may also find Lauralee’s post about task cards is right up your alley!
Author Note
Melissa Kruse is a former middle and high school English teacher and current instructional coach. You can find her on her blog, Reading and Writing Haven.

